- Do You Have a Visa?
- Complete Immigration in UNDER 5 Minutes
- Essential Packing List
- Money
- How to Get Internet
- Dining Options
- How to Get to Your Accommodation
- Getting More Help
*This is a BLOG version of my video guide on YouTube:

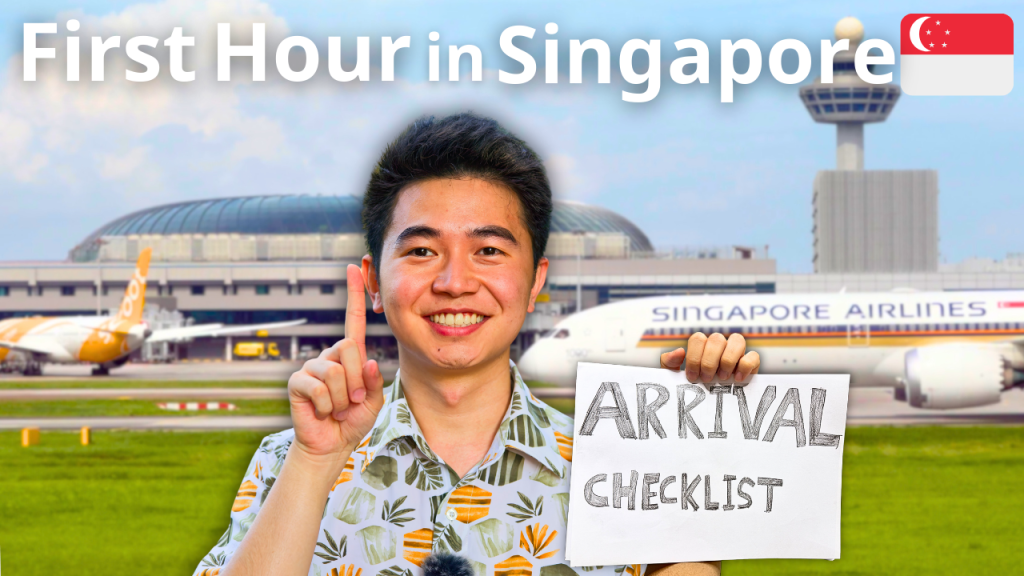
Hello adventurer,
Congratulations you have just landed in Singapore. You’ve cleared immigrations, collected your luggages, and you’re probably standing in the arrival hall of Changi Airport… but what do you do now?
Where do you get cash? How about simcard for internet? How to get to your hotel? In this post, we’ll answer those questions and a LOT more to make sure that your first hour in Singapore goes smoothly without a hitch.
Stick to the end because this is guaranteed to save you HOURS of trouble and frustration down the road
Let’s begin!
Firstly, here are some essential information that you should know BEFORE your departure. So let’s rewind a few hours before your flight~
Do You Have a Visa?
This one will make or break your trip.
If you are holding a passport from these following countries, you’ll need to apply for an entry Visa:
Source: ICA
- Afghanistan
- Algeria
- Armenia
- Azerbaijan
- Bangladesh
- Belarus
- Democratic People’s Republic of Korea
- Egypt
- Georgia
- India
- Iran
- Iraq
- Jordan
- Kazakhstan
- Kosovo
- Kyrgyzstan
- Lebanon
- Libya
- Mali
- Moldova
- Morocco
- Nigeria
- Pakistan
- Russia
- Somalia
- “>South Sudan
- Sudan
- Syria
- Tajikistan
- Tunisia
- Turkmenistan
- Ukraine
- Uzbekistan
- Yemen
BEWARE of scammy third party websites that CLAIM to help you apply for a visa. Stick to the official SG agency: the ICA which stands for Immigration and Checkpoints Authority.
Complete Immigration in UNDER 5 Minutes
Here’s a HACK that can help you COMPLETE the immigration processes in under 5 minutes.
Although not everyone needs a visa, EVERYONE needs to complete the Arrival Card also known as the SGAC.
The trick is to fill it up in ADVANCE, ONLINE up to 3 days in advance. You can easily find it directly at the ICA website, FREE OF CHARGE. If you did it correctly, you’ll clear the immigrations LIGHTNING fast!
While the SGAC is free… you know what’s not free??
Essential Packing List

Luggage space – it’s VERY expensive, BUT packing your luggage WRONG can be EVEN more expensive. So here are my ESSENTIAL packing list for your smooth trip to Singapore
To Deal with the HEAT
The weather in SG is tropical and sunny. you can expect hot and humid all year round. It averages around 28 deg Celcius ALL year. To survive the sweltering heat, bring clothes that are comfortable to sweat in.

Personally I always wear polyester based shirts and avoid cotton shirts. According to research, although cotton is more absorbent, it retains more of your sweat. Consequently, once you sweat ALOT, you’ll be drowning in your cotton.
To complete your protection, also bring your favorite hat and sunglasses.
…And the COLD
Ironically I also suggest bringing a jacket because in SOME shopping malls the air conditioning could be very cold. A light jacket would do!
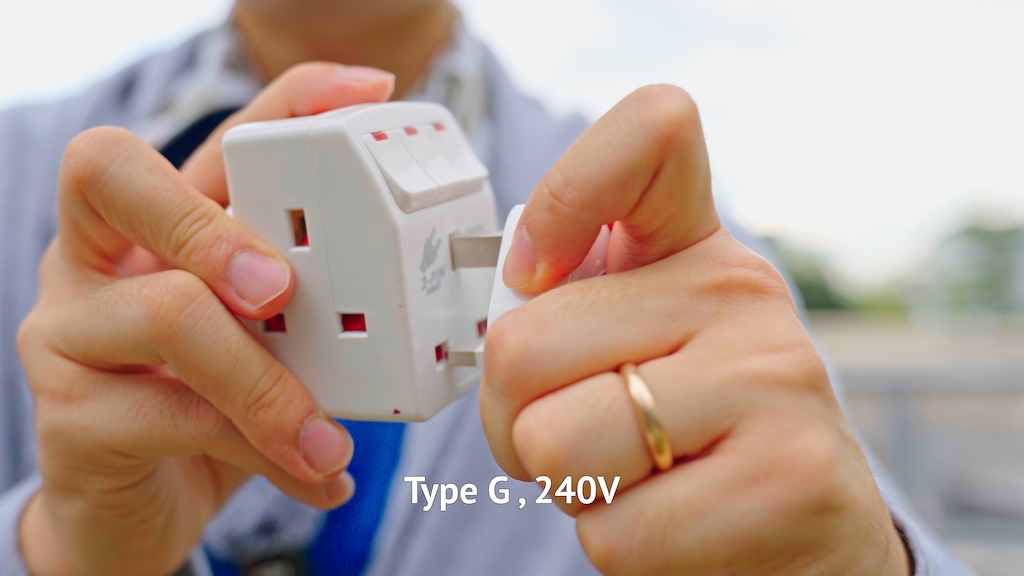
To Keep Your Devices Alive
Bring an adaptor that fits into these 3 pin plugs (type G 240V)
Personally I carry these kind of universal adaptor and never think about which plug to bring ever again.
Rainy Days
As we are In the tropics, rain is a daily possibility. So keep an umbrella close

Money
Now we are back to the present- Let’s talk about money!
Here we use the SINGAPORE DOLLARS.

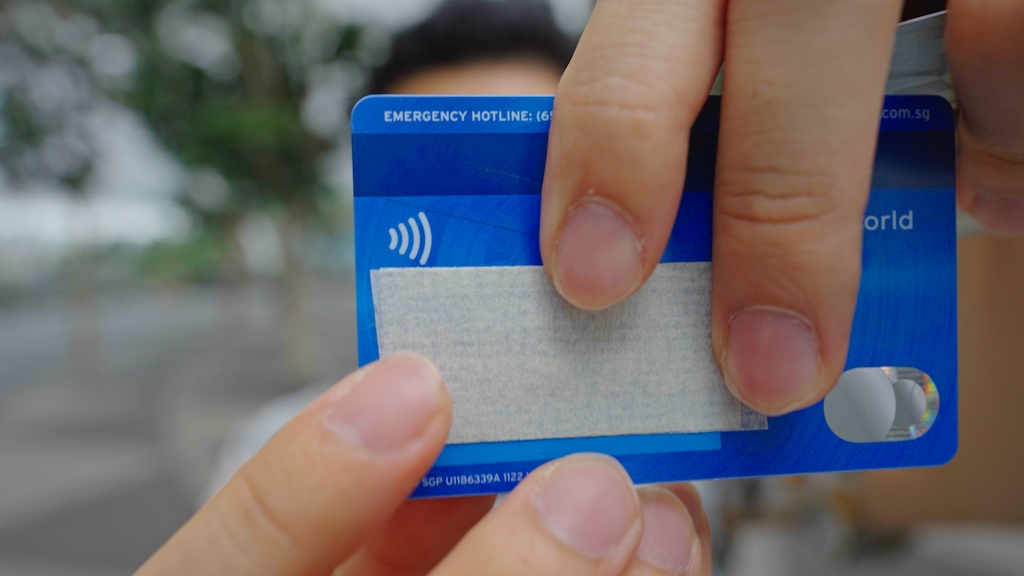
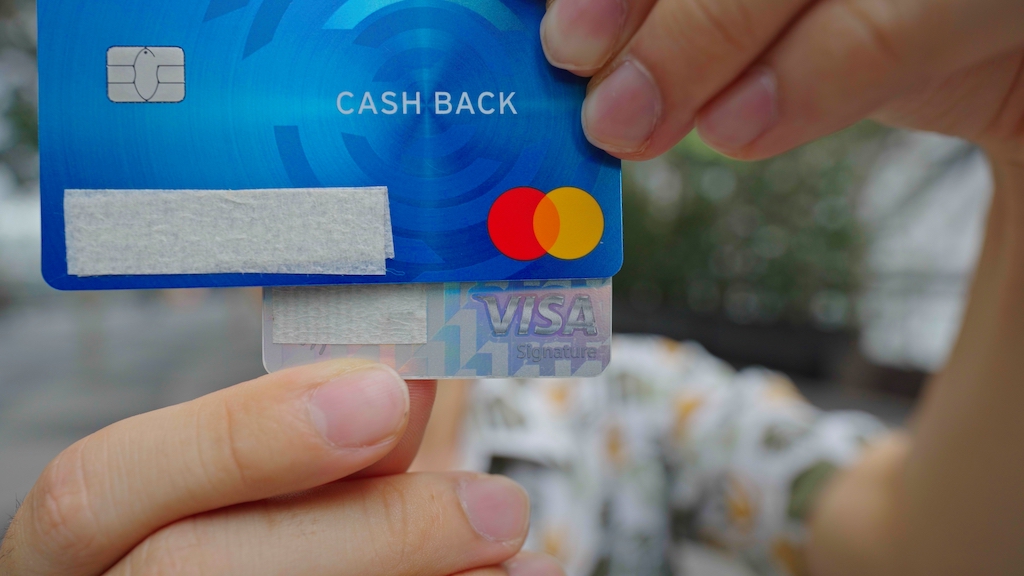
You can TOTALLY avoid the hassle of carrying much cash in Singapore by sticking to your CREDIT CARD. Almost ALL shops in SG will accept credit card payment.

As long as your card has VISA or MASTERCARD logo and these sideways WIFI icon, you can also use it to take the public transport. However, EACH individual will need his own card. Do note that for foreign issued credit cards there is a fee of 60 Singapore CENTS per day that it’s used to take public transport.
Honestly, compared to the SG Tourist Pass that’s at least $11 per day
and Ez-Link cash card that costs $10 for the card itself- plus all the excess value at the end of your trip… 60 cents per day is a STEAL.

I have a whole separate guide for SG Public Transport Basics you can check out later!
I still recommend carrying SOME cash- about $20 of cash per person per day for places that do not accept card.
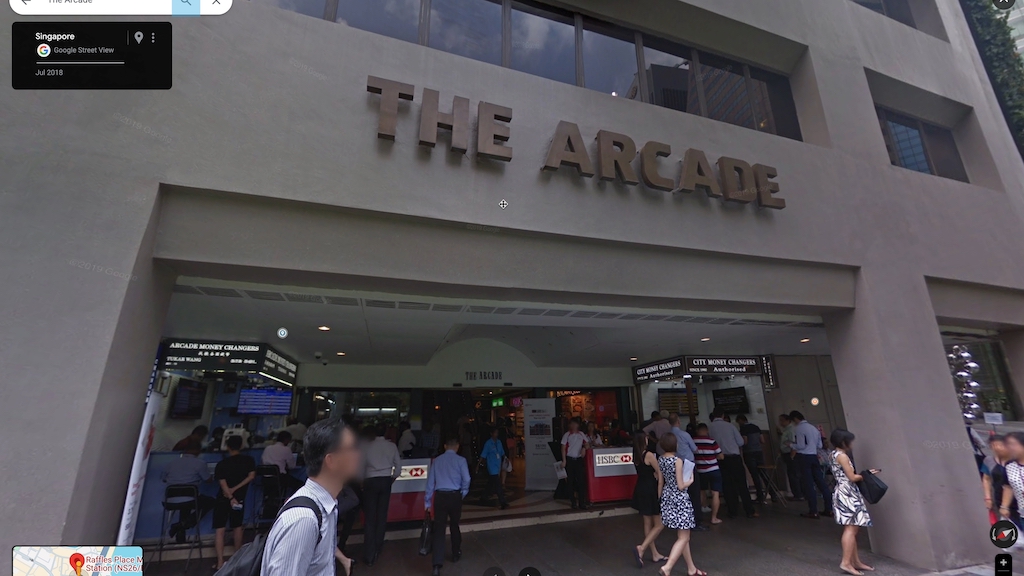
Where to Get Cash
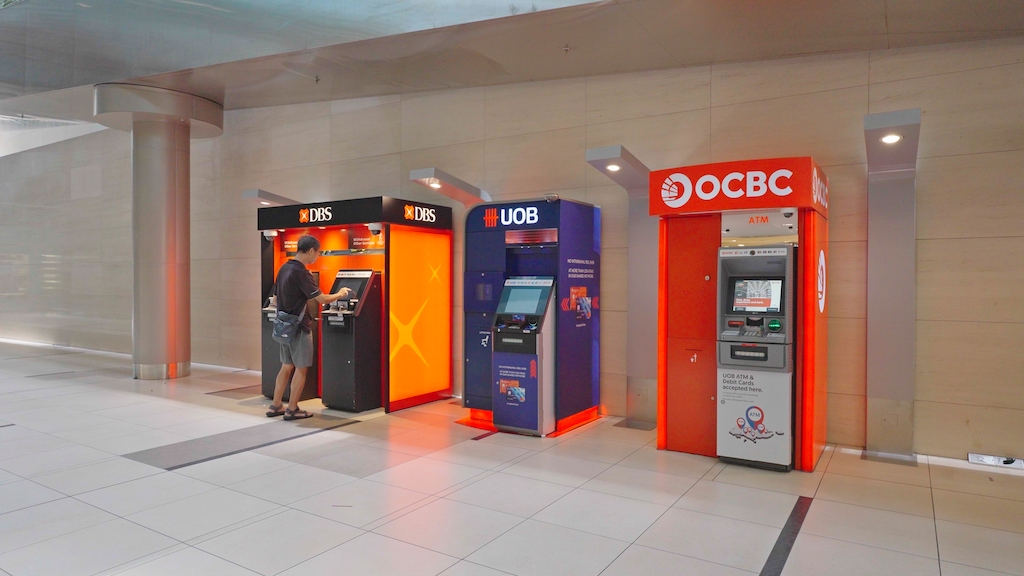

To get your cold hard cash, you can use the international ATMs that’s everywhere or the money changers. There are always some in the airport, BUT the exchagne rates down at Raffles Place area is better than the airport. Look out for this building called The Arcade.
How to Get Internet
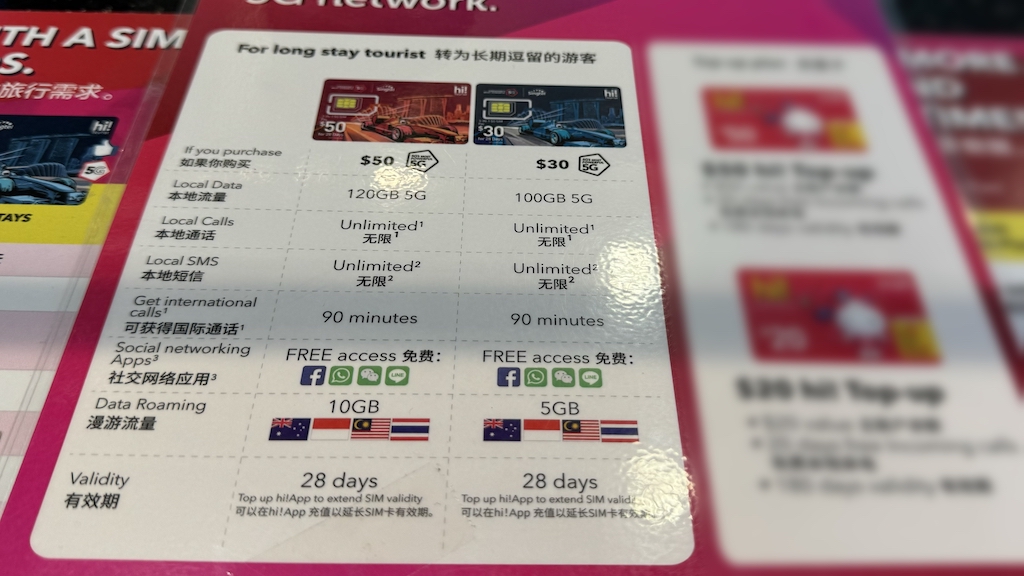
In today’s world, access to the internet is almost as important as OXYGEN. To keep yourself connected throughout your visit in Singapore, the easiest option is to get a prepaid sim card.
From the arrival hall, look out for these booths along the arrival hall. The major provider brands here are Singtel and Starhub
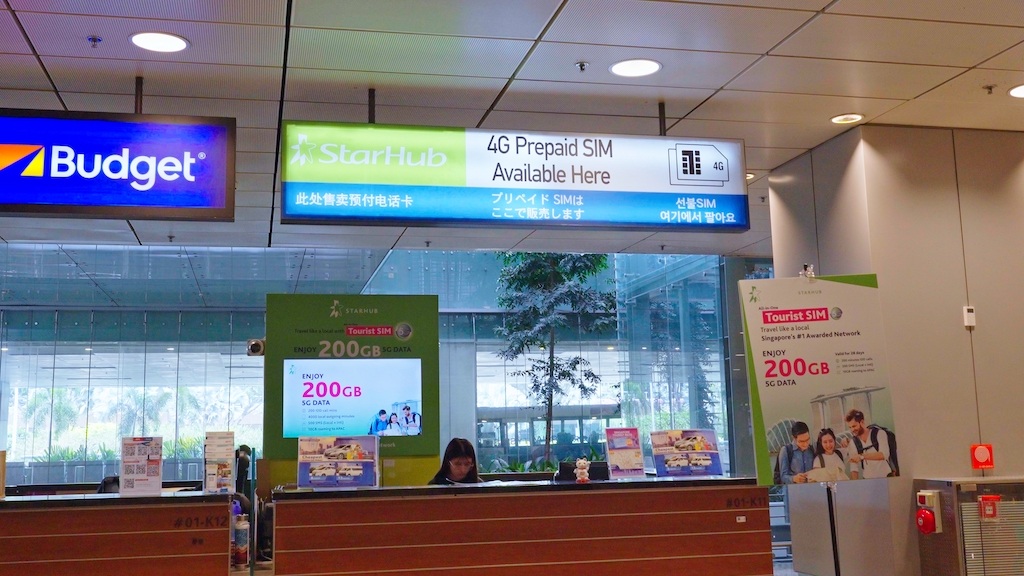
The simcards packages you can get range from 1 week to 1 month. To extend the validity and add more gigabytes, you can download their mobile app and top up there.
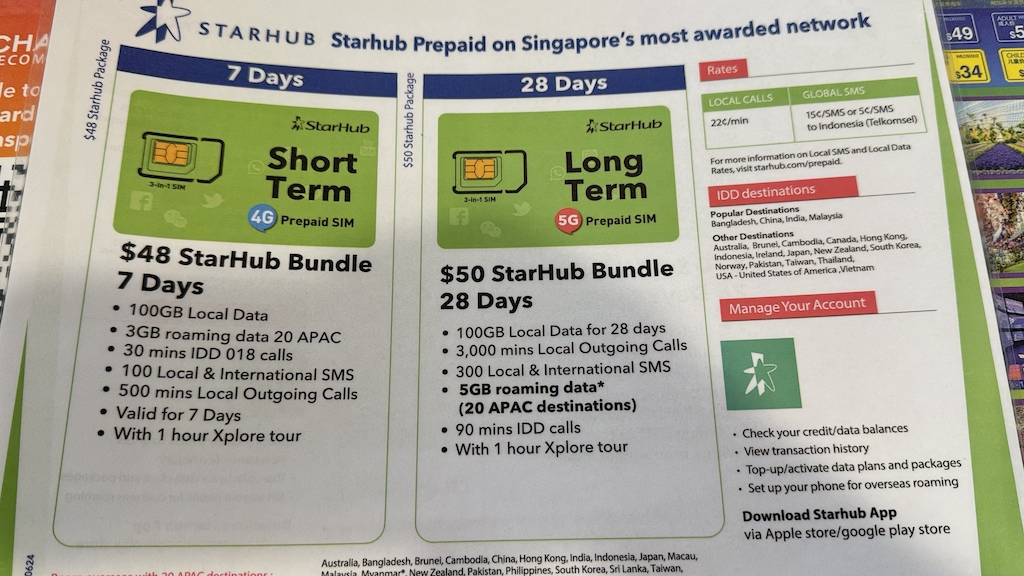
If you didnt manage to get one at the airport, you can find these sim cards at any convenience stores like 7-11 or Cheers.

If your phone can support e-sim, that’s even better. Then you don’t even need to trouble yourself finding a shop to buy a simcard.
By the way if you find this video helpful, please leave a like so more people can find it. Thank you very much!
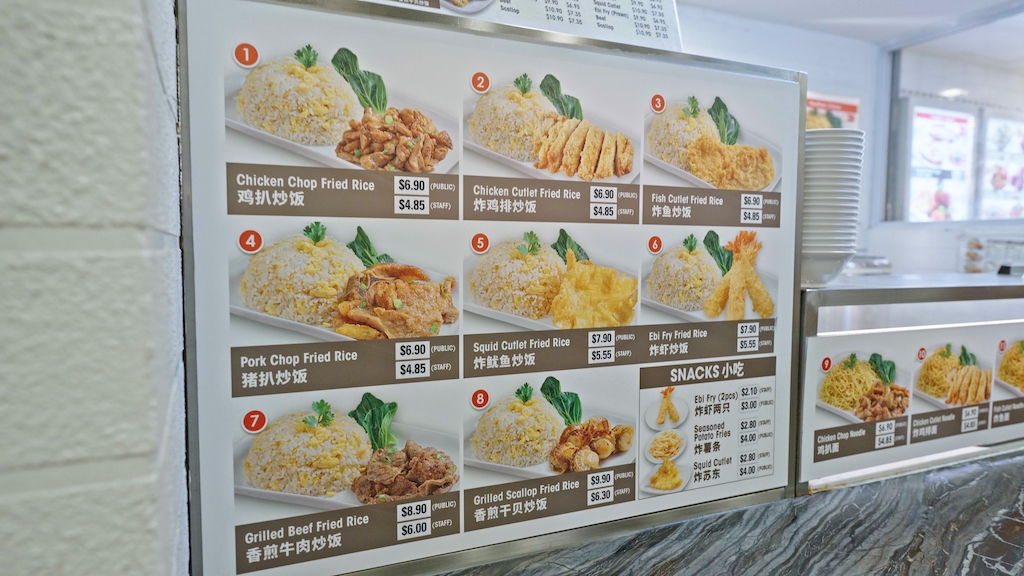
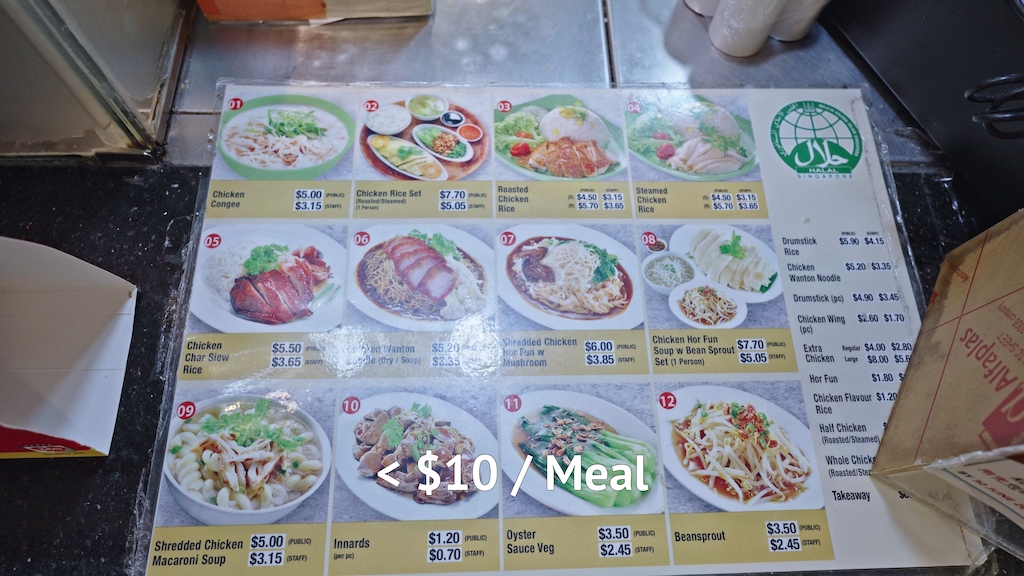
Dining Options
Are you HUNGRY after your long flight? You’re in luck because the airport is an EXCELLENT place for a bite.
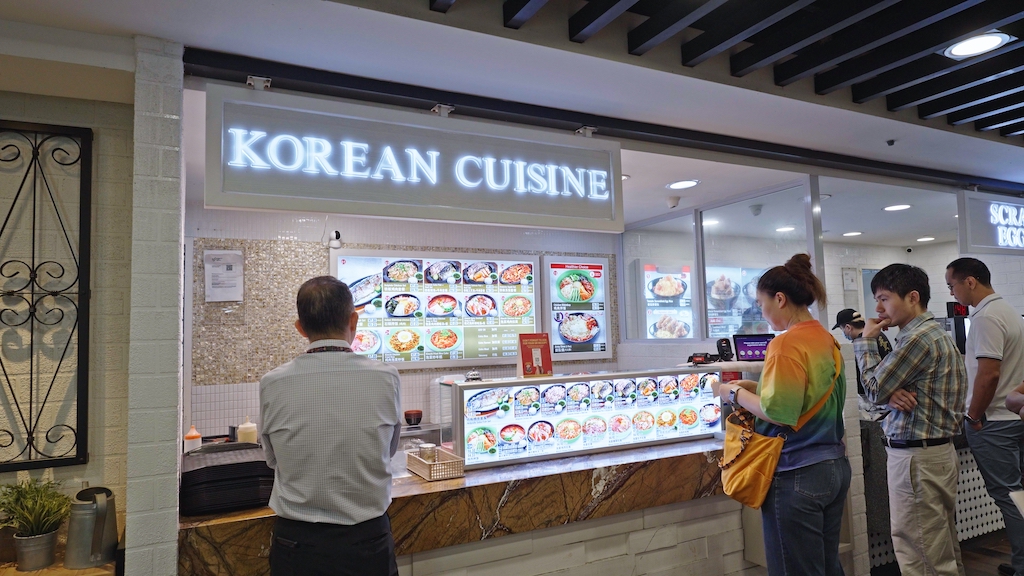
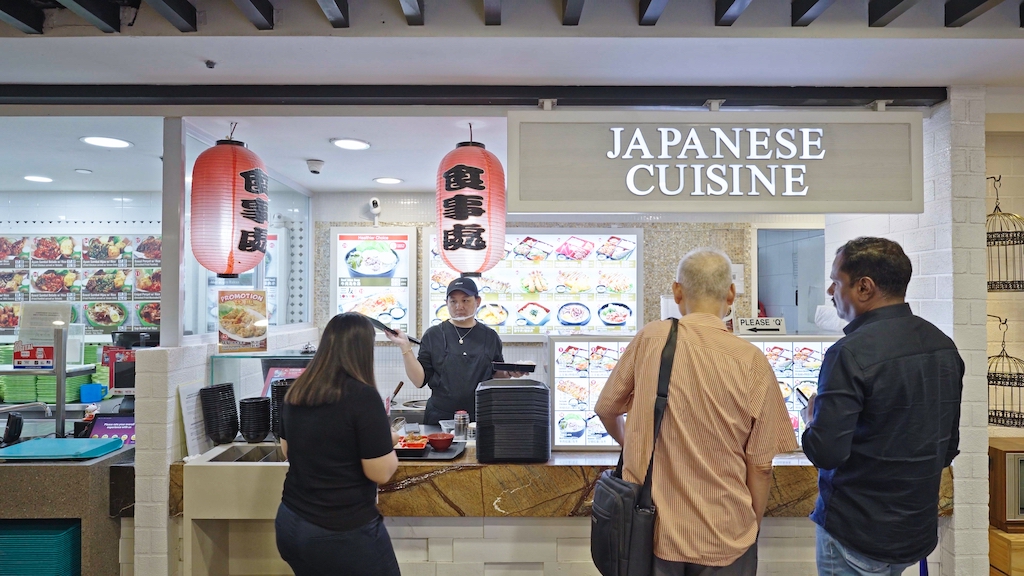
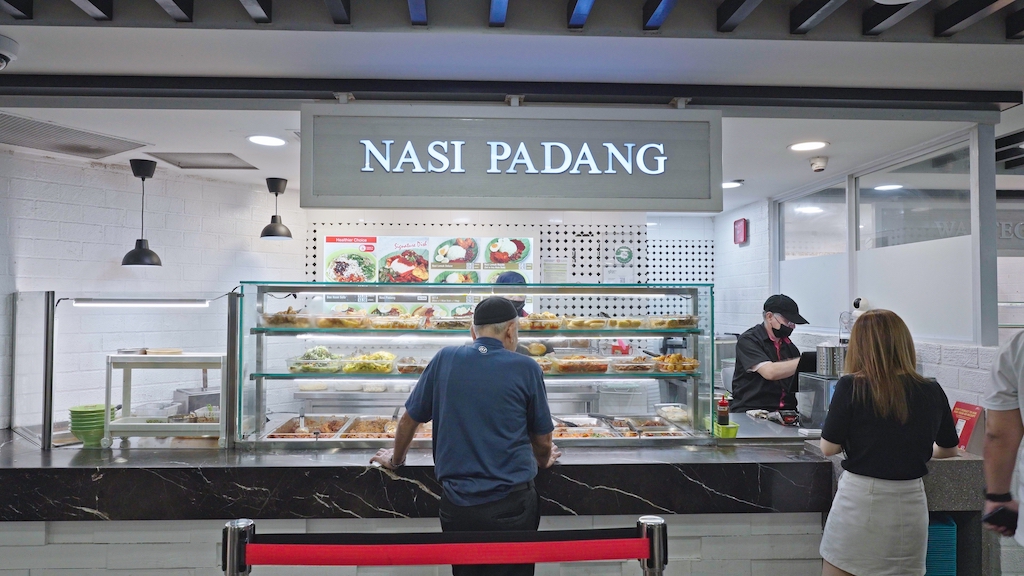

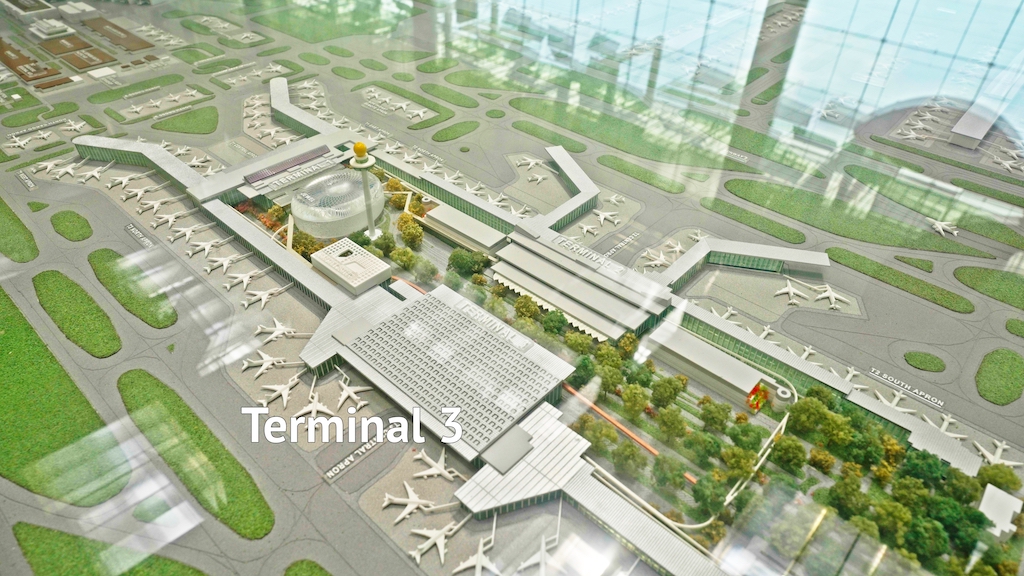
For good value and LOCAL FOOD options, I recommend going to T3 and eating at the KOPITIAM food court. The food here is decent and its prices are reasonable. You can even find Korean, Japanese, and Indonesian food here!
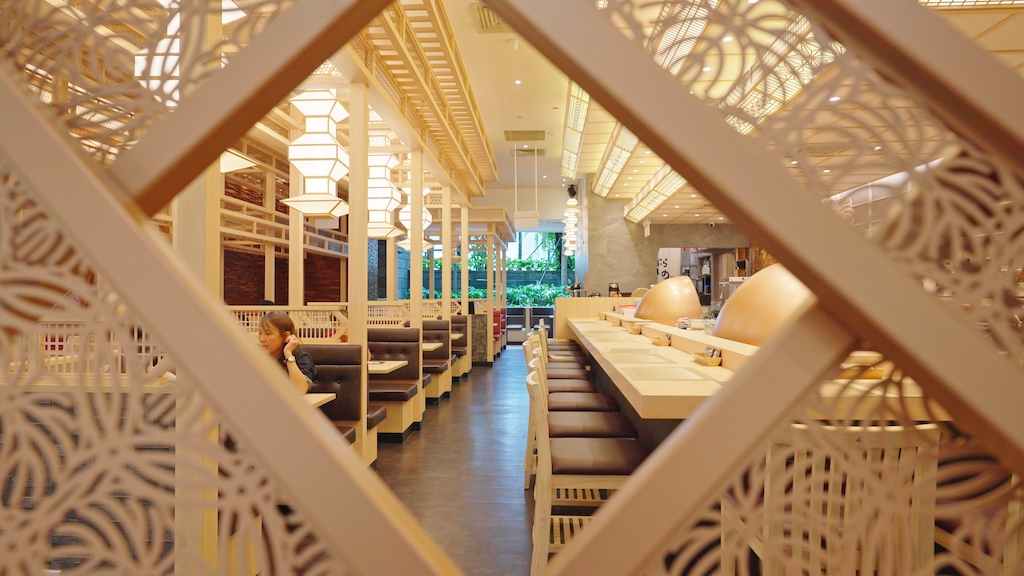
For more posh dining options, each terminal has some good restaurants. For an even BIGGER array of options, visit the JEWEL shopping mall which is right in the center of the terminals. There’s a huge array of international menu but expect to spend at least $25 per head…
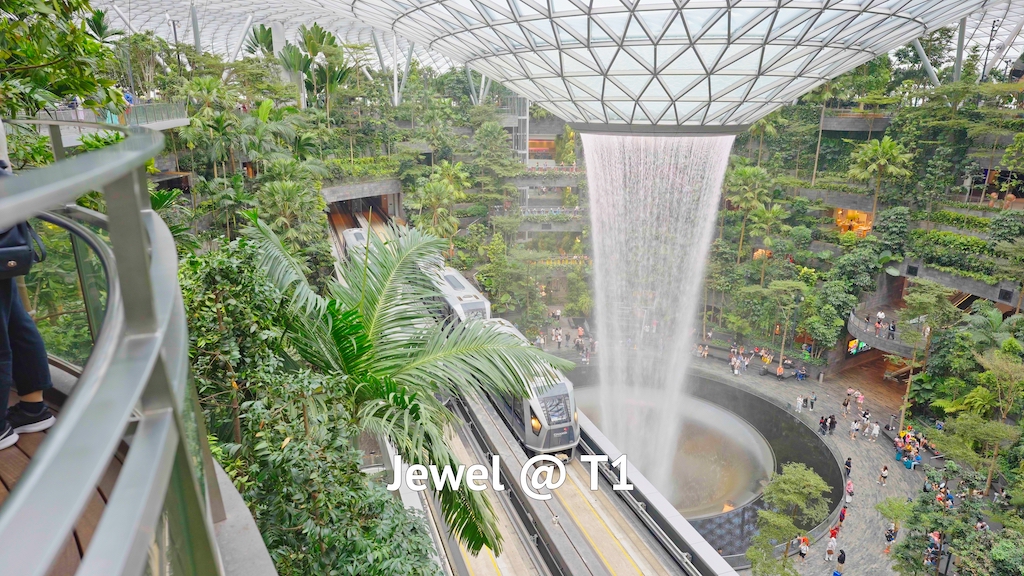
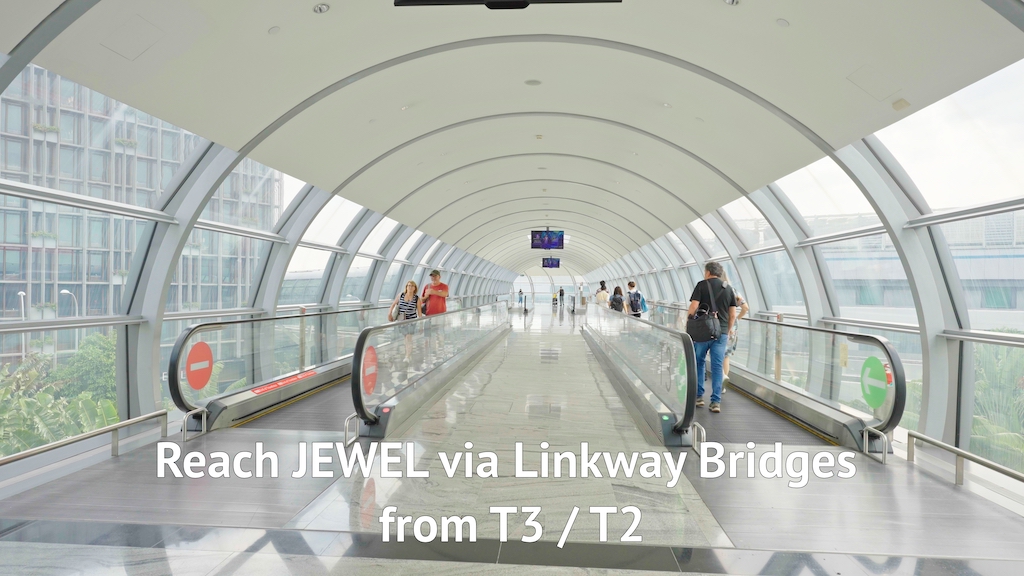
It’s at T1 but you can easily reach it via the linkway from T3 and T2
How to Get to Your Accommodation
Now the MOST important part: how to get to your accommodation.
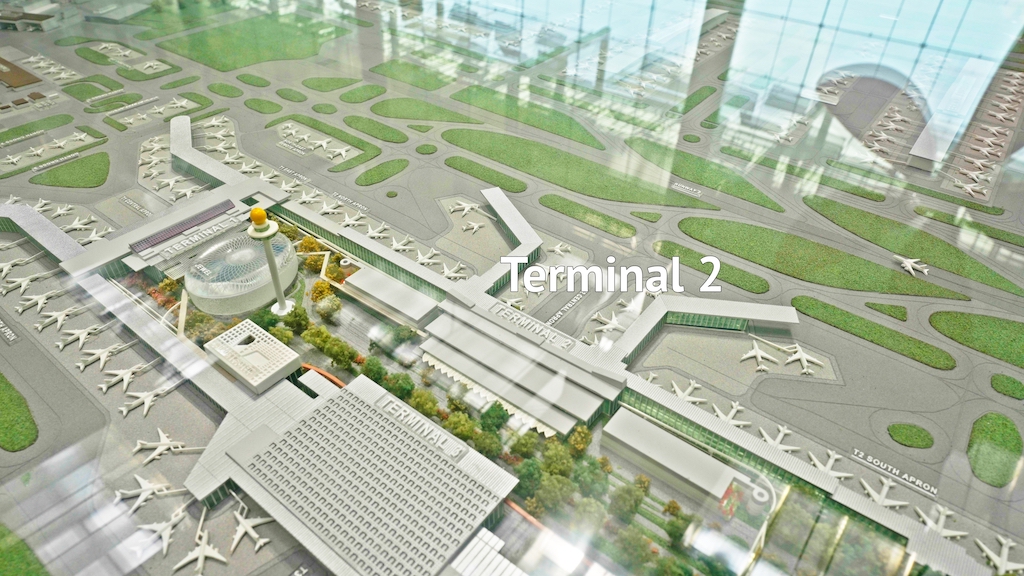
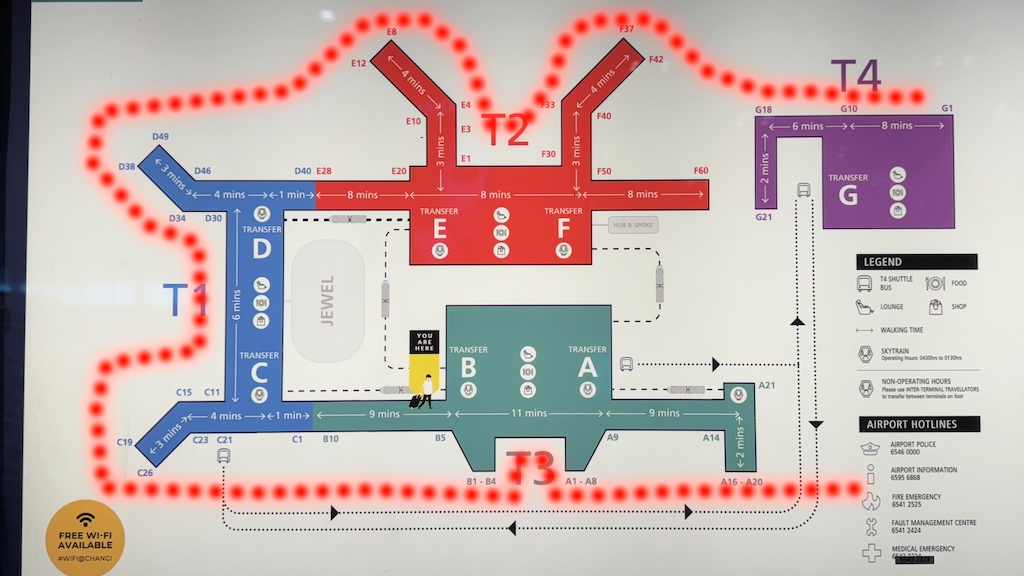
Let me give you an overview of the airport:
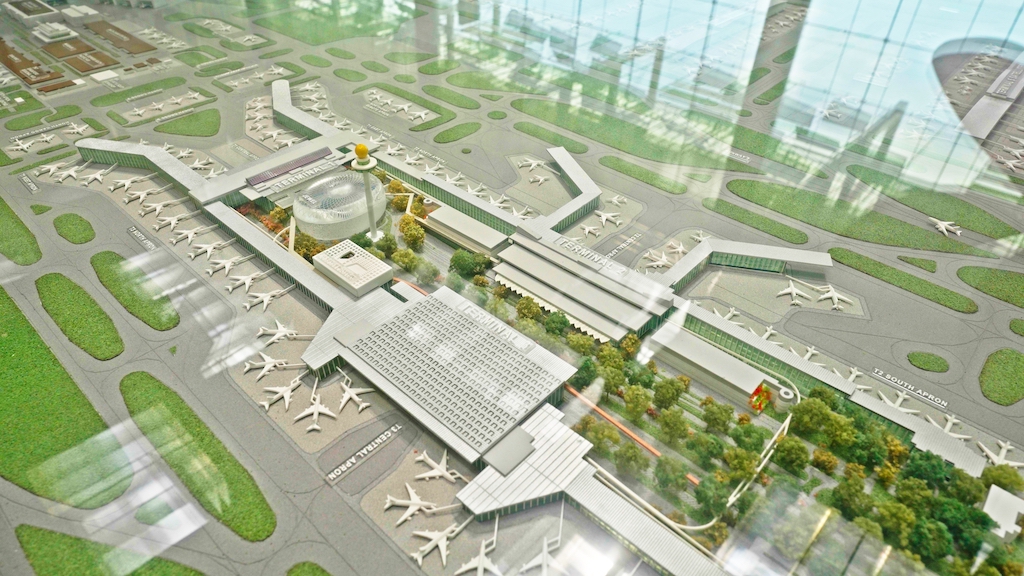
As of 2024 there are 4 main terminals. Terminal 3,1,2 are all within 1 continuous building, while T4 is slightly off site. Link to the indoor map here.

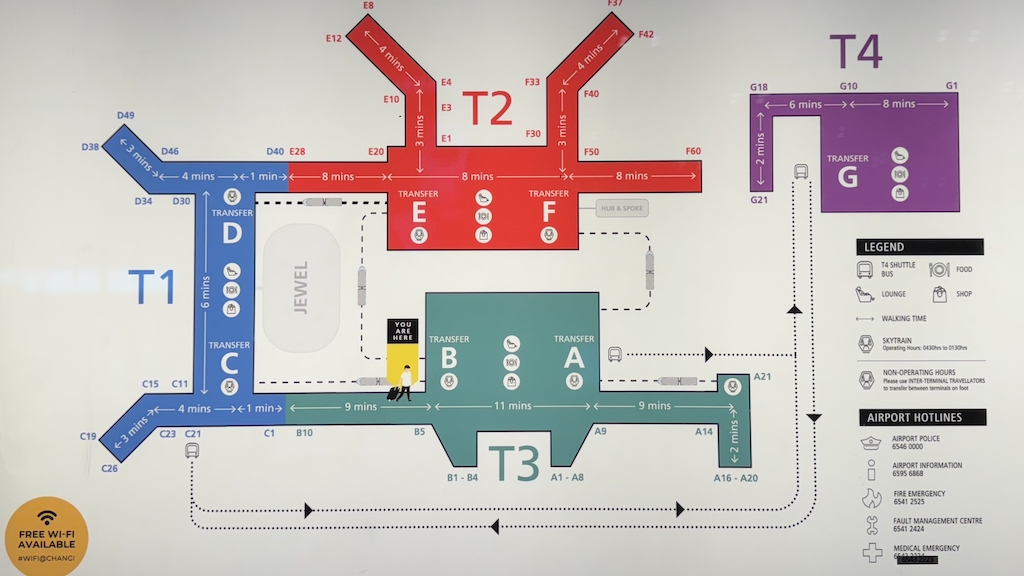
Public Transportation
Public bus services runs along a dedicated road under the terminals going from T3, to T1, then T2 – and SOME buses also pass by T4.

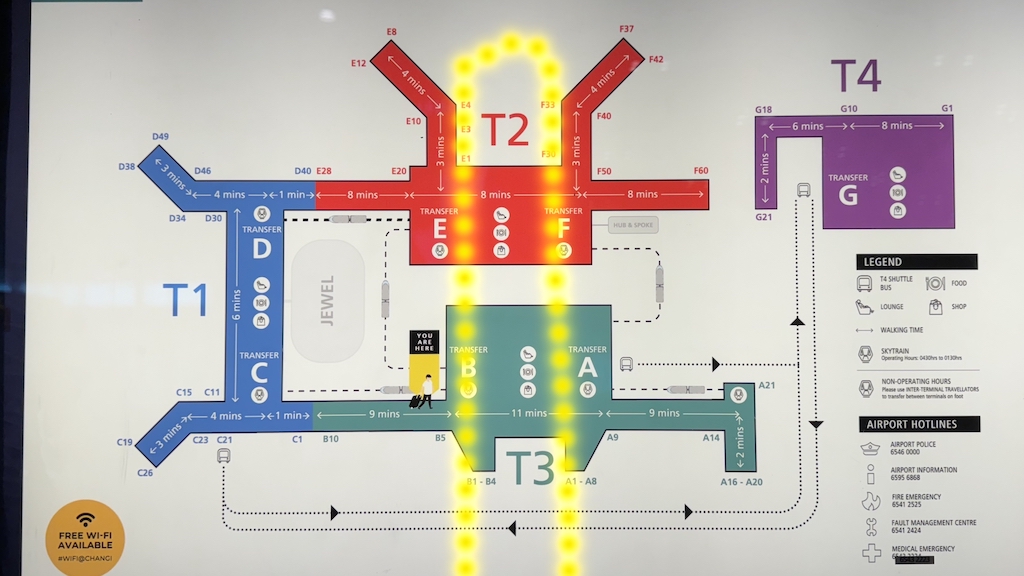
The train services also runs underground, but only through T3 and T2 which is accessible on foot by these bridges.

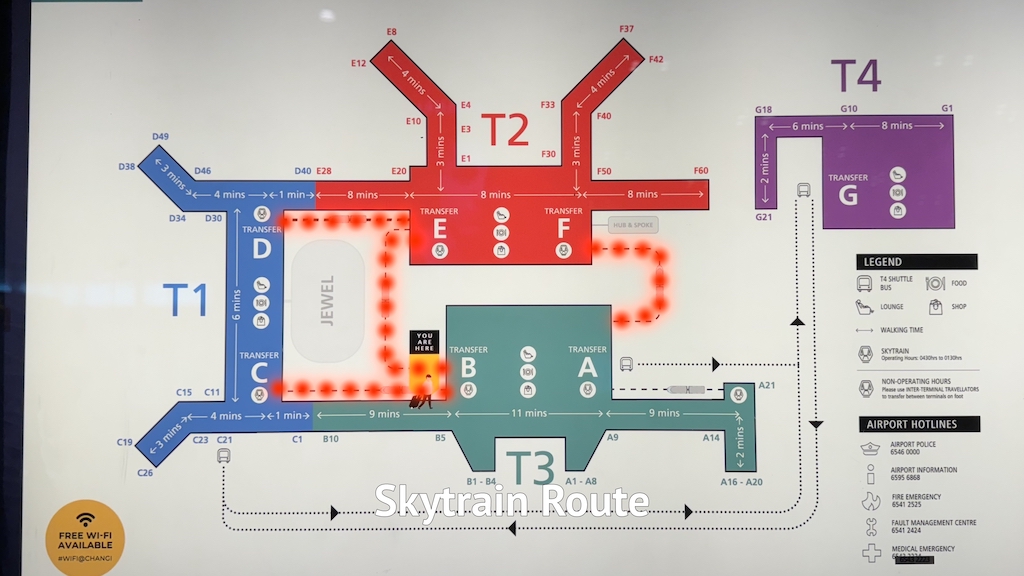
To get between the terminals, theres a monorail services called skytrain that serves transit between T1, T2, and T3. However, to get to T4, you can only take the public/shuttle buses.
Example Transit
So if you are planning to take the train BUT you landed in T1:
- Walk or take the skytrain to either T3 or T2. You can even take any bus service for and get off at T2 which is only 1 stop away
- Once in T3 or T2, Easily follow the signboards that say “train to city”
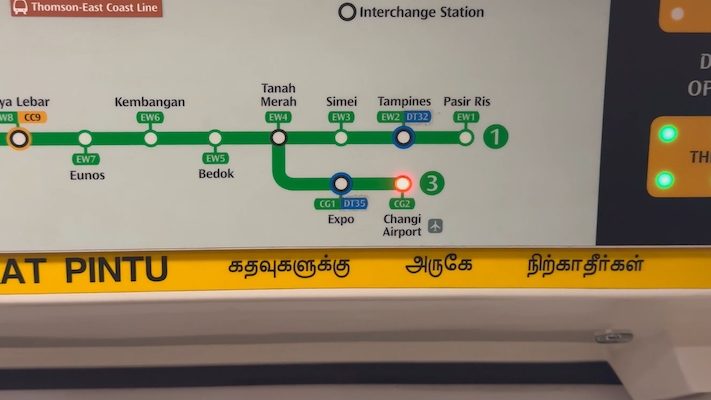
When taking the train out of the airport don’t be surprised when it stops at Tanah Merah station. The train service normally shuttle to and from Tanah Merah and Changi Airport. So you just have to change train according to your route. To go to the city, change to the train going towards TUAS LINK.
Private Transport
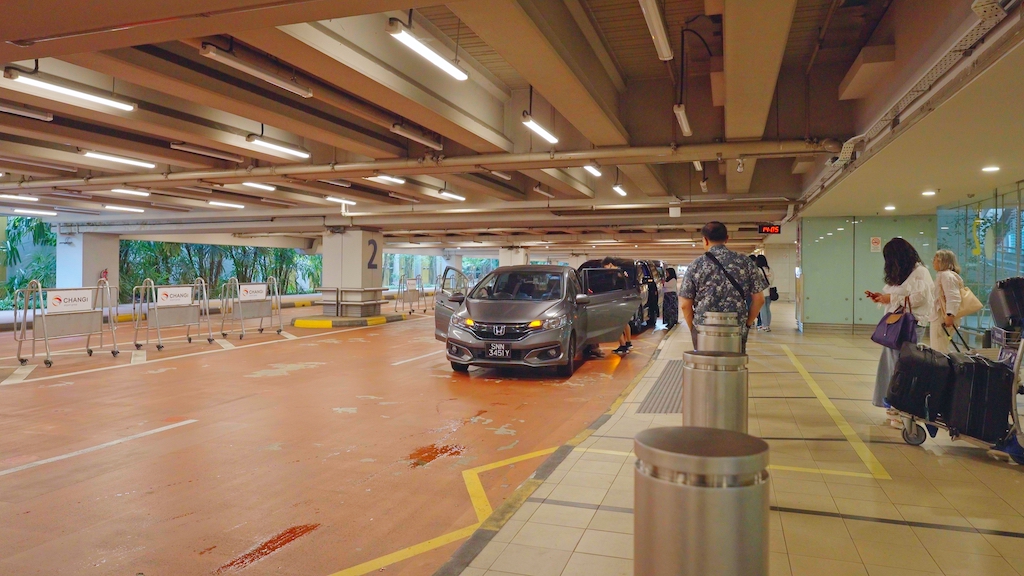
If you prefer to PAY a higher price for speed and comfort, go for the taxis from taxi stands at each of the terminals.
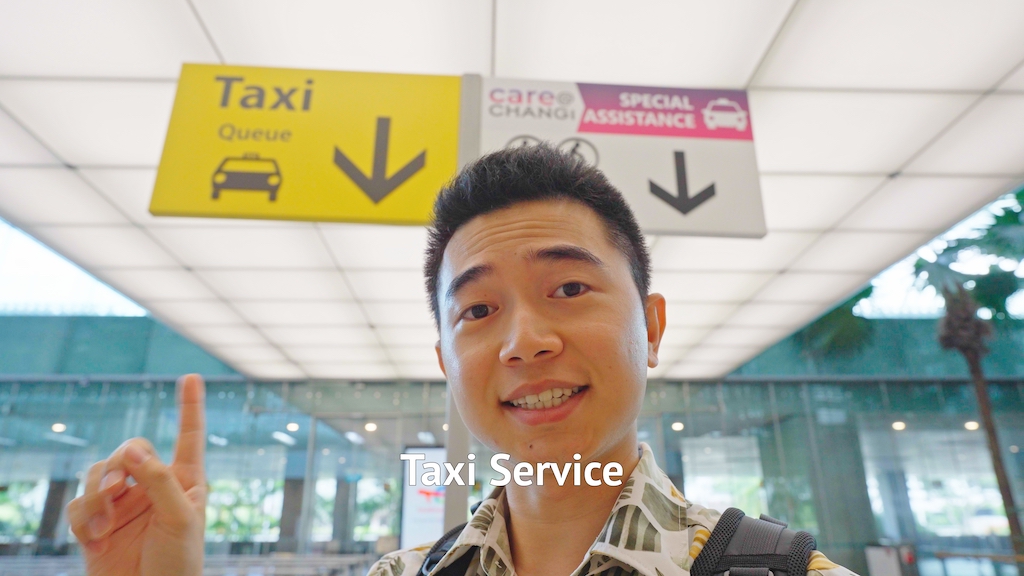
All taxis here run on a meter BUT theres a surcharge for pickups from the airport…. thats why it’s called TAX-Y !!

Personally I recommend downloading ride hailing applications such as grab, gojek, or tada. These apps makes finding a ride throughout the rest of your trip much easier. I just need to input my pickup and destination and a car will come and get me there. You don’t have to go through the trouble of explaining to the driver WHERE you’re trying to go, which is almost impossible if you’re a tourist. You also get to see the cost of the ride prices, making it easier to keep your trip within budget.
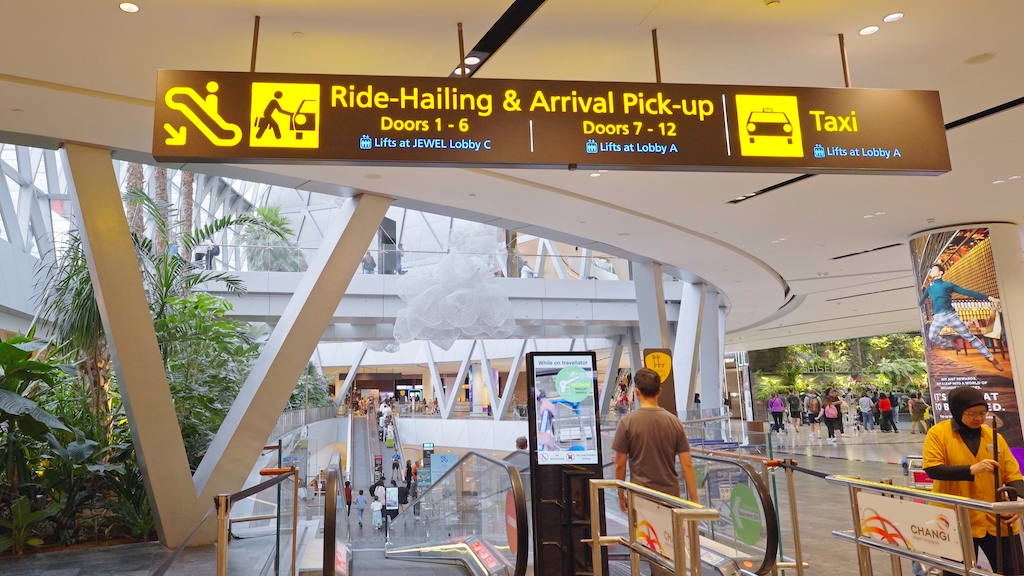
Each terminal has very convenient dedicated pickup points for private hire pickup. Just follow the signboard that say “Private Hire pickup”.
Remember to put in the correct DOOR number when you set your pickup location!
I recommend downloading in advance so you can setup your account and link your payment method. These applications will surely be helpful to you down the road.
Getting More Help
No matter how prepared you are in your travels, sometimes you still need some help from the locals. For example, trying to find where is the toilet
or getting some help to take a photo.
The good news is, it’s super easy to get from in Singapore! MOST people speak English, with many also speaking Chinese, and some also speak Malay, Bahasa Indonesia, and Tamil.
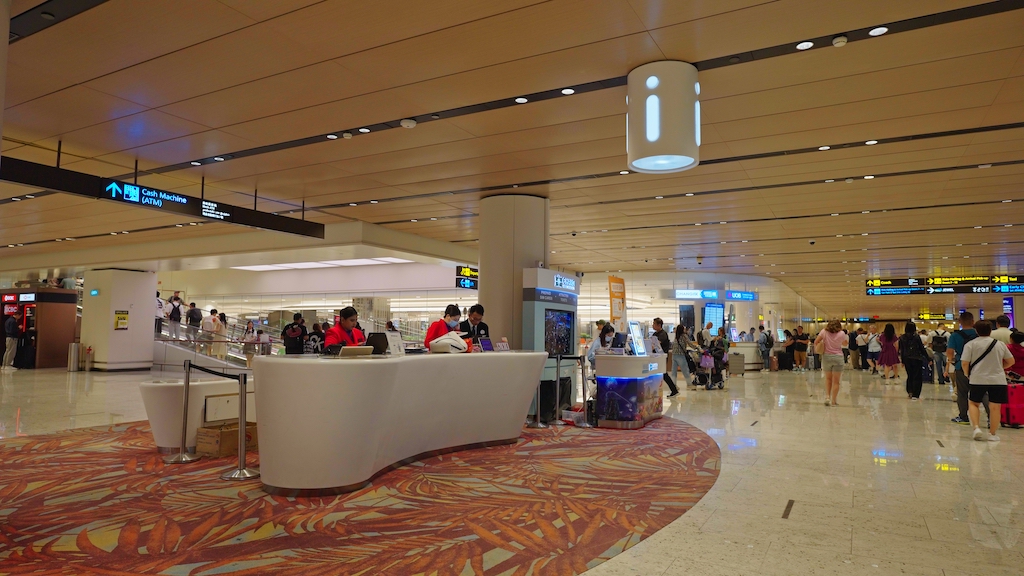
Other than the help kiosks around the airport, feel free to find Singaporeans around you for help. Although we Singaporeans mostly keep to ourselves we are more than happy to help you explore our beloved city.
So please reach out 🙂 ….just please don’t make small talk. To me can la, but I think most Singaporeans don’t really like small talk.
To make your second hour onwards in Singapore just as smooth
Check out my other Singapore Travel Guides. I’ll see you there!